Installing the orchestrator
The easiest way to install the orchestrator is via helmchart in kubernetes. The deployed service needs to be able to listen to webhooks from github for using github actionsInstall the helm chart
Install thedigger-backend helm chart from https://diggerhq.github.io/helm-charts/, leaving empty all the data related to the GitHub App. You can also use the postgres database defined within the helmchart or define your own. Here’s a good starter set for my-values.yml:
mydigger.yml and run the following helm commands to install it in your k8s cluster:

Configuring Azure terraform repo
Configure OIDC credentials for actions
We can configure OIDC access using a registration app and subscription ID access. To get these Azure OIDC authentication values, you’ll need to set up an Azure App Registration and gather the required identifiers. Here’s how to obtain each value:Azure Client ID
- Go to the Azure Portal (portal.azure.com)
- Navigate to Azure Active Directory > App registrations
- Create a new app registration or select an existing one
- On the app’s Overview page, copy the Application (client) ID
Azure Tenant ID
- In the same app registration’s Overview page, copy the Directory (tenant) ID
- Alternatively, go to Azure Active Directory > Overview and find the Tenant ID
Azure Subscription ID
- Go to Subscriptions in the Azure Portal
- Select the subscription you want to use
- Copy the Subscription ID from the overview page
Setting up for GitHub Actions OIDC
For GitHub Actions with OIDC (which is likely what you’re setting up), you’ll also need to:- Configure the App Registration for OIDC:
- In your app registration, go to Certificates & secrets
- Under Federated credentials, add a new credential
- Choose GitHub Actions deploying Azure resources
- Set the organization, repository, and environment/branch details
- Add secrets to your GitHub repository:
- Go to your GitHub repo > Settings > Secrets and variables > Actions
- Add these as repository secrets:
AZURE_CLIENT_IDAZURE_TENANT_IDAZURE_SUBSCRIPTION_ID
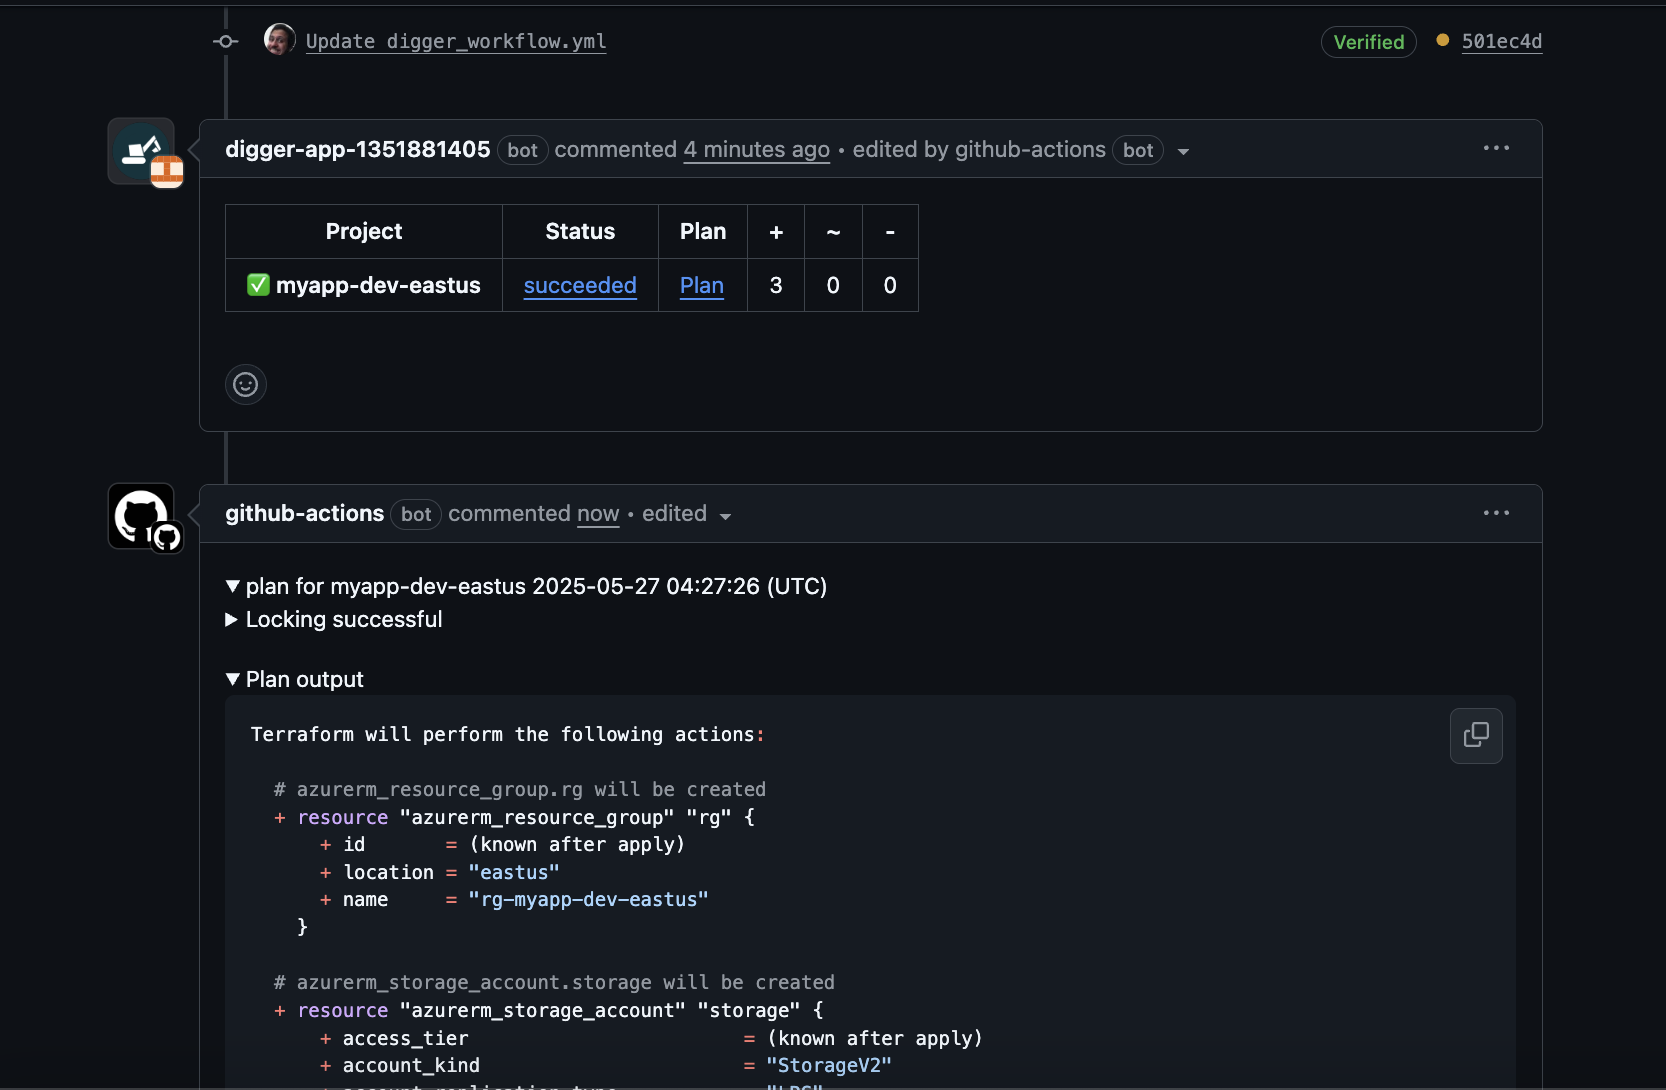
Configure Github workflow:
create this github workflow in your repository under.github/workflow/digger_workflow.yml